


Setting Up a Montessori Play Space
How to set up a Montessori play space with what you already have and why it matters. Plus bilingual baby brains, intrinsic motivation, and SNOW!!!!!

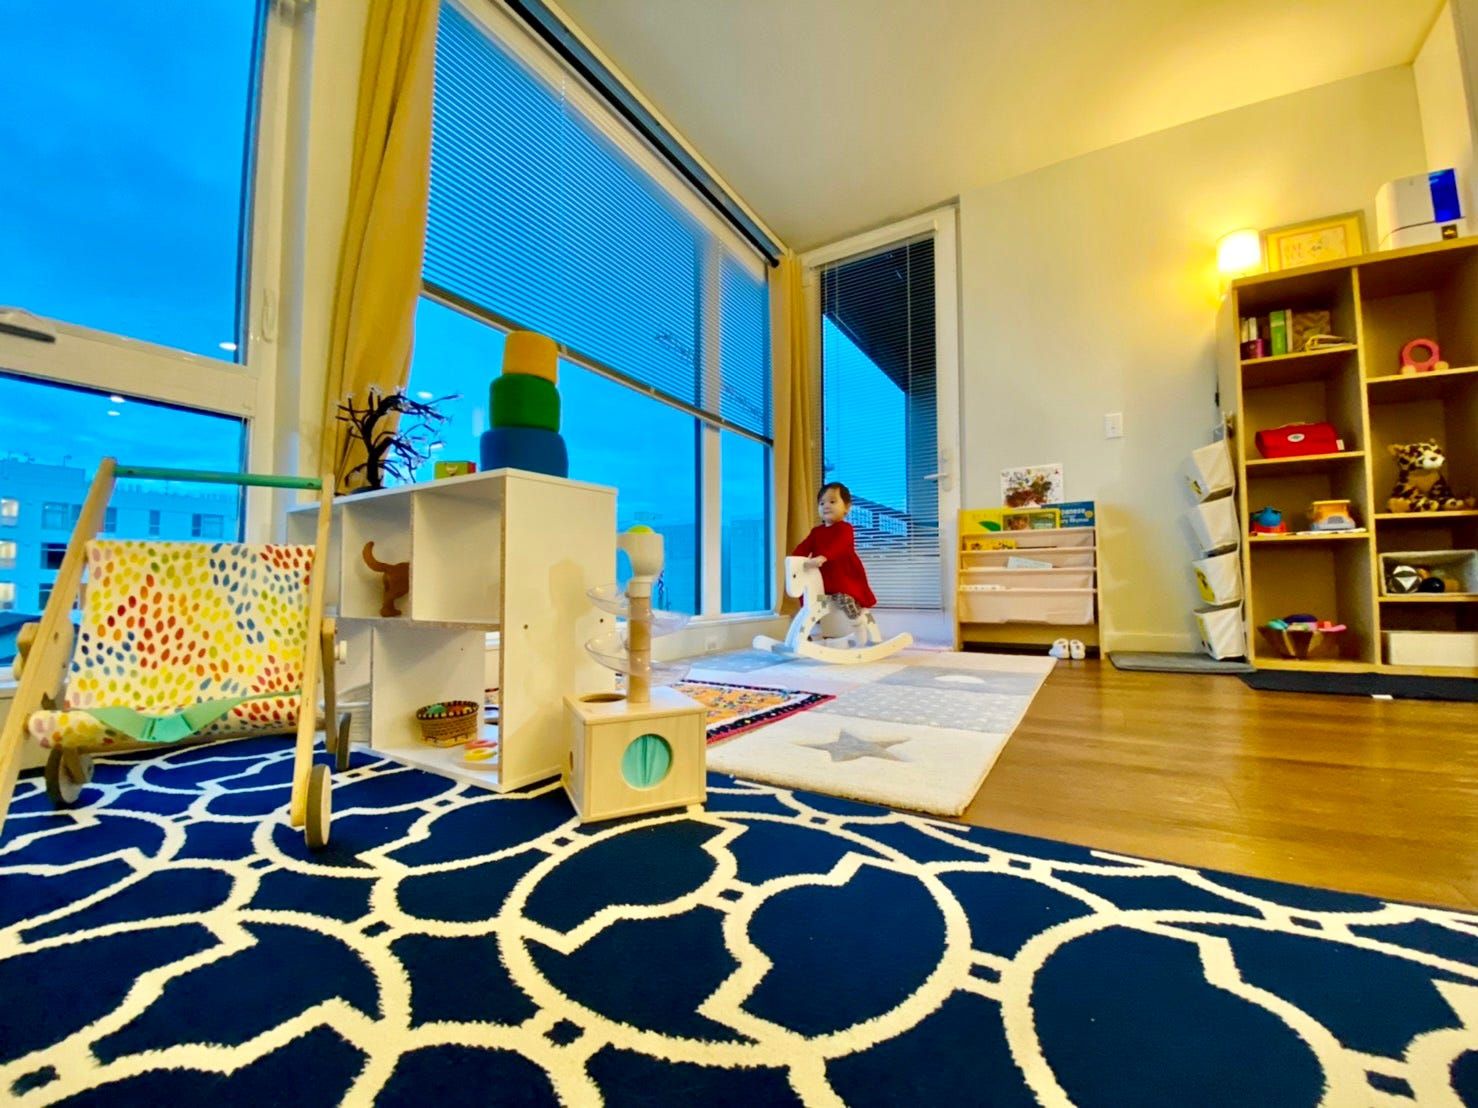
We recently redid L’s play space to make it more toddler friendly now that she is so busy all the time! I am excited to share with you how to set up a Montessori play space for your child in your home using the space and materials you already have.
What is a Montessori play space?
Before we begin, I want to point out that Montessori is NOT one size fits all. It is a very adaptable philosophy and the principles can be used regardless of what materials you have or what your play space looks like.
A Montessori play space is simple with a limited number of toys/activities. I reason for only providing a limited number of toys is that it helps children focus for longer periods of time and gain mastery of activities rather than just going from one activity to the next.
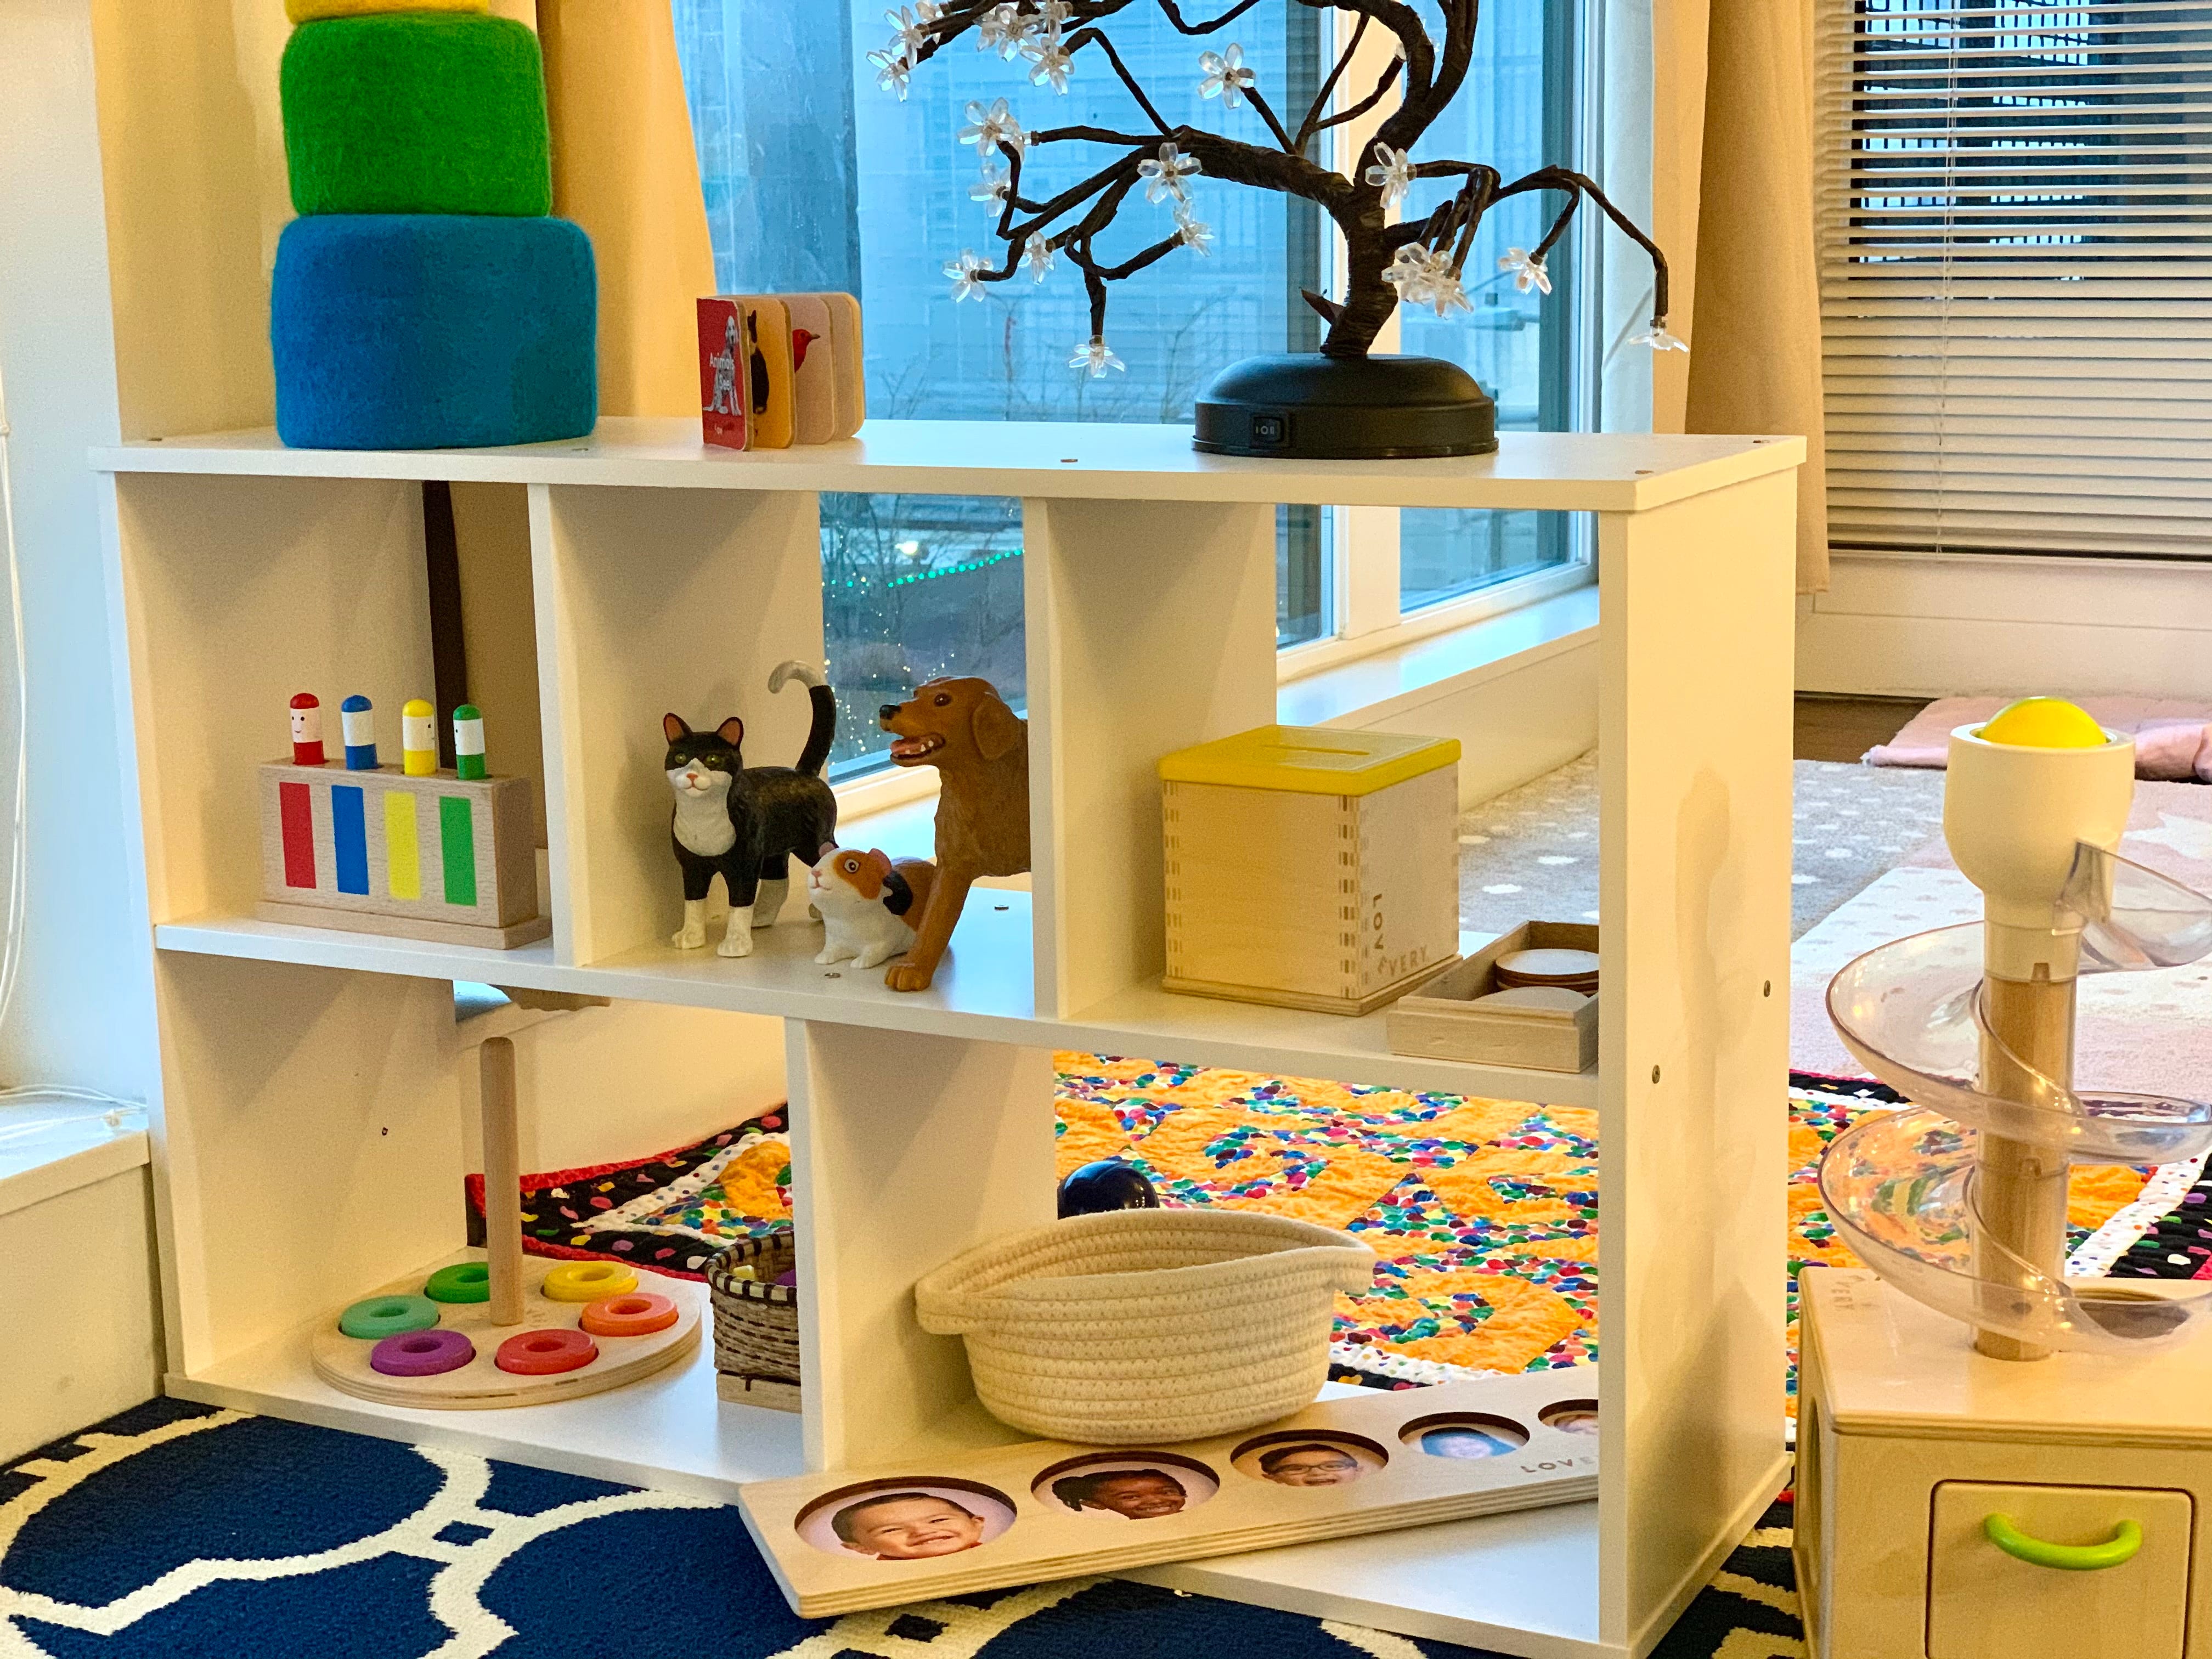
Many Montessori guides recommend between 8-10 toys or activities in the play space at a time. I have found that 6 or fewer was a good number when L was younger. Now, I provide her with around 8 in addition to a few open ended toys (blocks, cars, balls). I usually rotate the toys on L’s shelf once a week and only those that she hasn’t touched in the past week. I have found toy rotation to be wonderful! I love seeing how she interacts with her toys changes as she gets older! You can read more about toy rotation here.
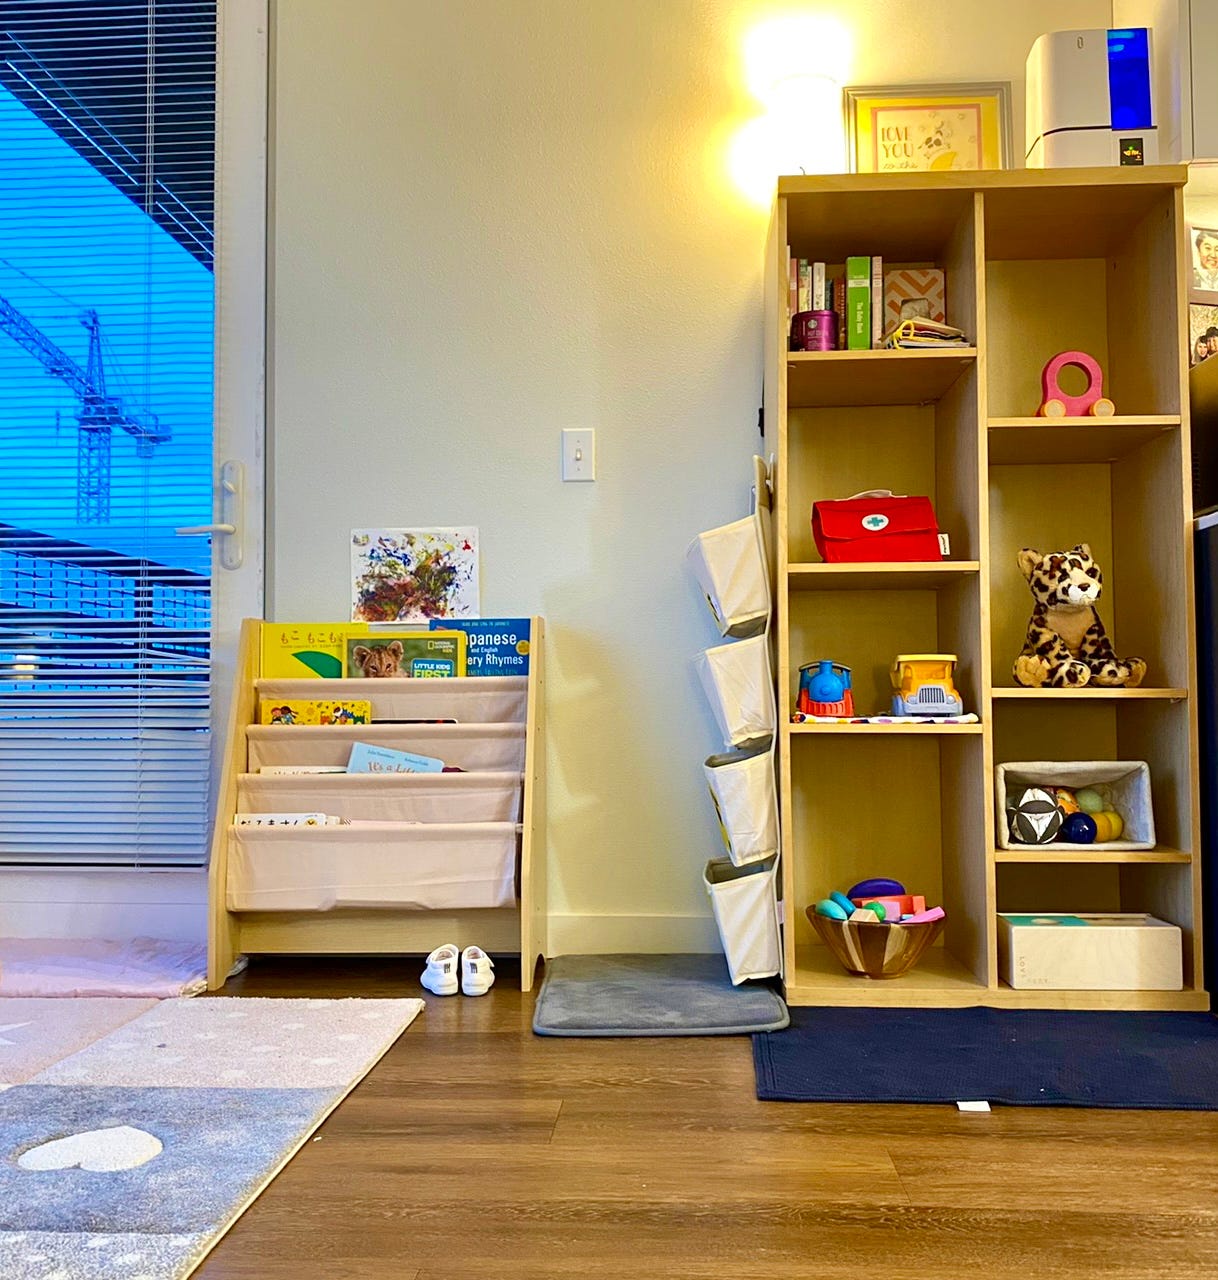
Toys and activities are displayed at child height. Commonly, this is done on an open toy shelf so that the child can clearly see all the toys at a glance, and each toy or activity has a clear space to “belong” creating a sense of order for the play space. The key is that we want the child to interact and engage with their toys as much as possible, so they should always be visible (not in a toy box). If you have limited space (like me), a large toy shelf may not be possible. I have found that a small book shelf works great when turned on the side. I even used a rug to frame a space and placed L’s toys around that for awhile. All of the toys should be age appropriate and serve a purpose (not just entertainment).You can read more about Montessori toys here.
Leave some space for movement (as much as possible)! I recently moved the location of L’s toy shelf to create more space for her to move. You have to work with the space you have. In our small apartment we were able to move things around to give L plenty of space to play, especially because she seems to really be into tumbling, climbing, and dancing recently. Tip: couch cushions work great for climbing and tumbling!
Why have a Montessori style play space?
Montessori play spaces are designed to promote engagement with the materials, focus, order, and independence. By offering only a few toys or activities at a time, clearly- at child height, we are setting up out children to feel invited to play with the toys and really focus on the materials that are out without being overwhelmed with choices. Only offering a few toys means that we need to observe our child for what they might be interested in and working on and provide appropriate materials for them. This fosters engagement and focus as well.
In a Montessori play space, each material has a place to belong. This promotes order and reduces playroom clutter, which in return promotes engagement and focus on the materials. It also helps the play space to feel calm, comfortable, and organized! Providing order in the play space helps with independence. When a child knows where are all the toys belong they can easily select the toy they want to work with, and they know right where to put the toy back when they finish.
The toys in Montessori play spaces are purposeful and are not just for entertainment. For this reason, you usually do not find battery operated toys. Many Montessori toys are made of natural materials and they all have a clear purpose to them. Although some can be quite expensive, there are cheaper options and many can be done DIY. Montessori toys are usually simple and focus on one skill at a time. They have a clear beginning and end to them. These features provide children with organized information, which is how young children learn best!
You can read more about hows and whys of Montessori play spaces here and here.
A Couple of Resources for You This Week!
This article by Simone Davies of The Montessori Notebook about building intrinsic motivation in kids.
Intrinsic motivation is a key Montessori principle. Intrinsic motivation is doing something because you have the inner drive to do not, not because of an external motivator such as a reward or punishment. Simone gives 42 ways to encourage this in your child. One of my favorite ways (that fits in perfectly with talking about a Montessori play space) is providing an environment where the child has success. This means having a space where children can find things on their own and materials are at their level.
This interview with Dr. Naja Ferjan Ramirez about bilingual baby brains is simply fascinating!
Although this interview doesn’t have anything to do with Montessori or positive parenting, it is a great read and new! Dr. Ferjan Ramirez says that by 11 months old babies are already learning the languages they are exposed to. She explains that babies are capable of learning two languages simultaneously to native fluency. She also points out that babies who are only exposed to one language lose the ability to distinguish between sounds that occur and don’t occur in that language. A bilingual child will retain that ability to distinguish sounds from both languages. Bilingualism is fascinating and I encourage you to read about it’s benefits!

The perfect winter invitation to play: snow painting!
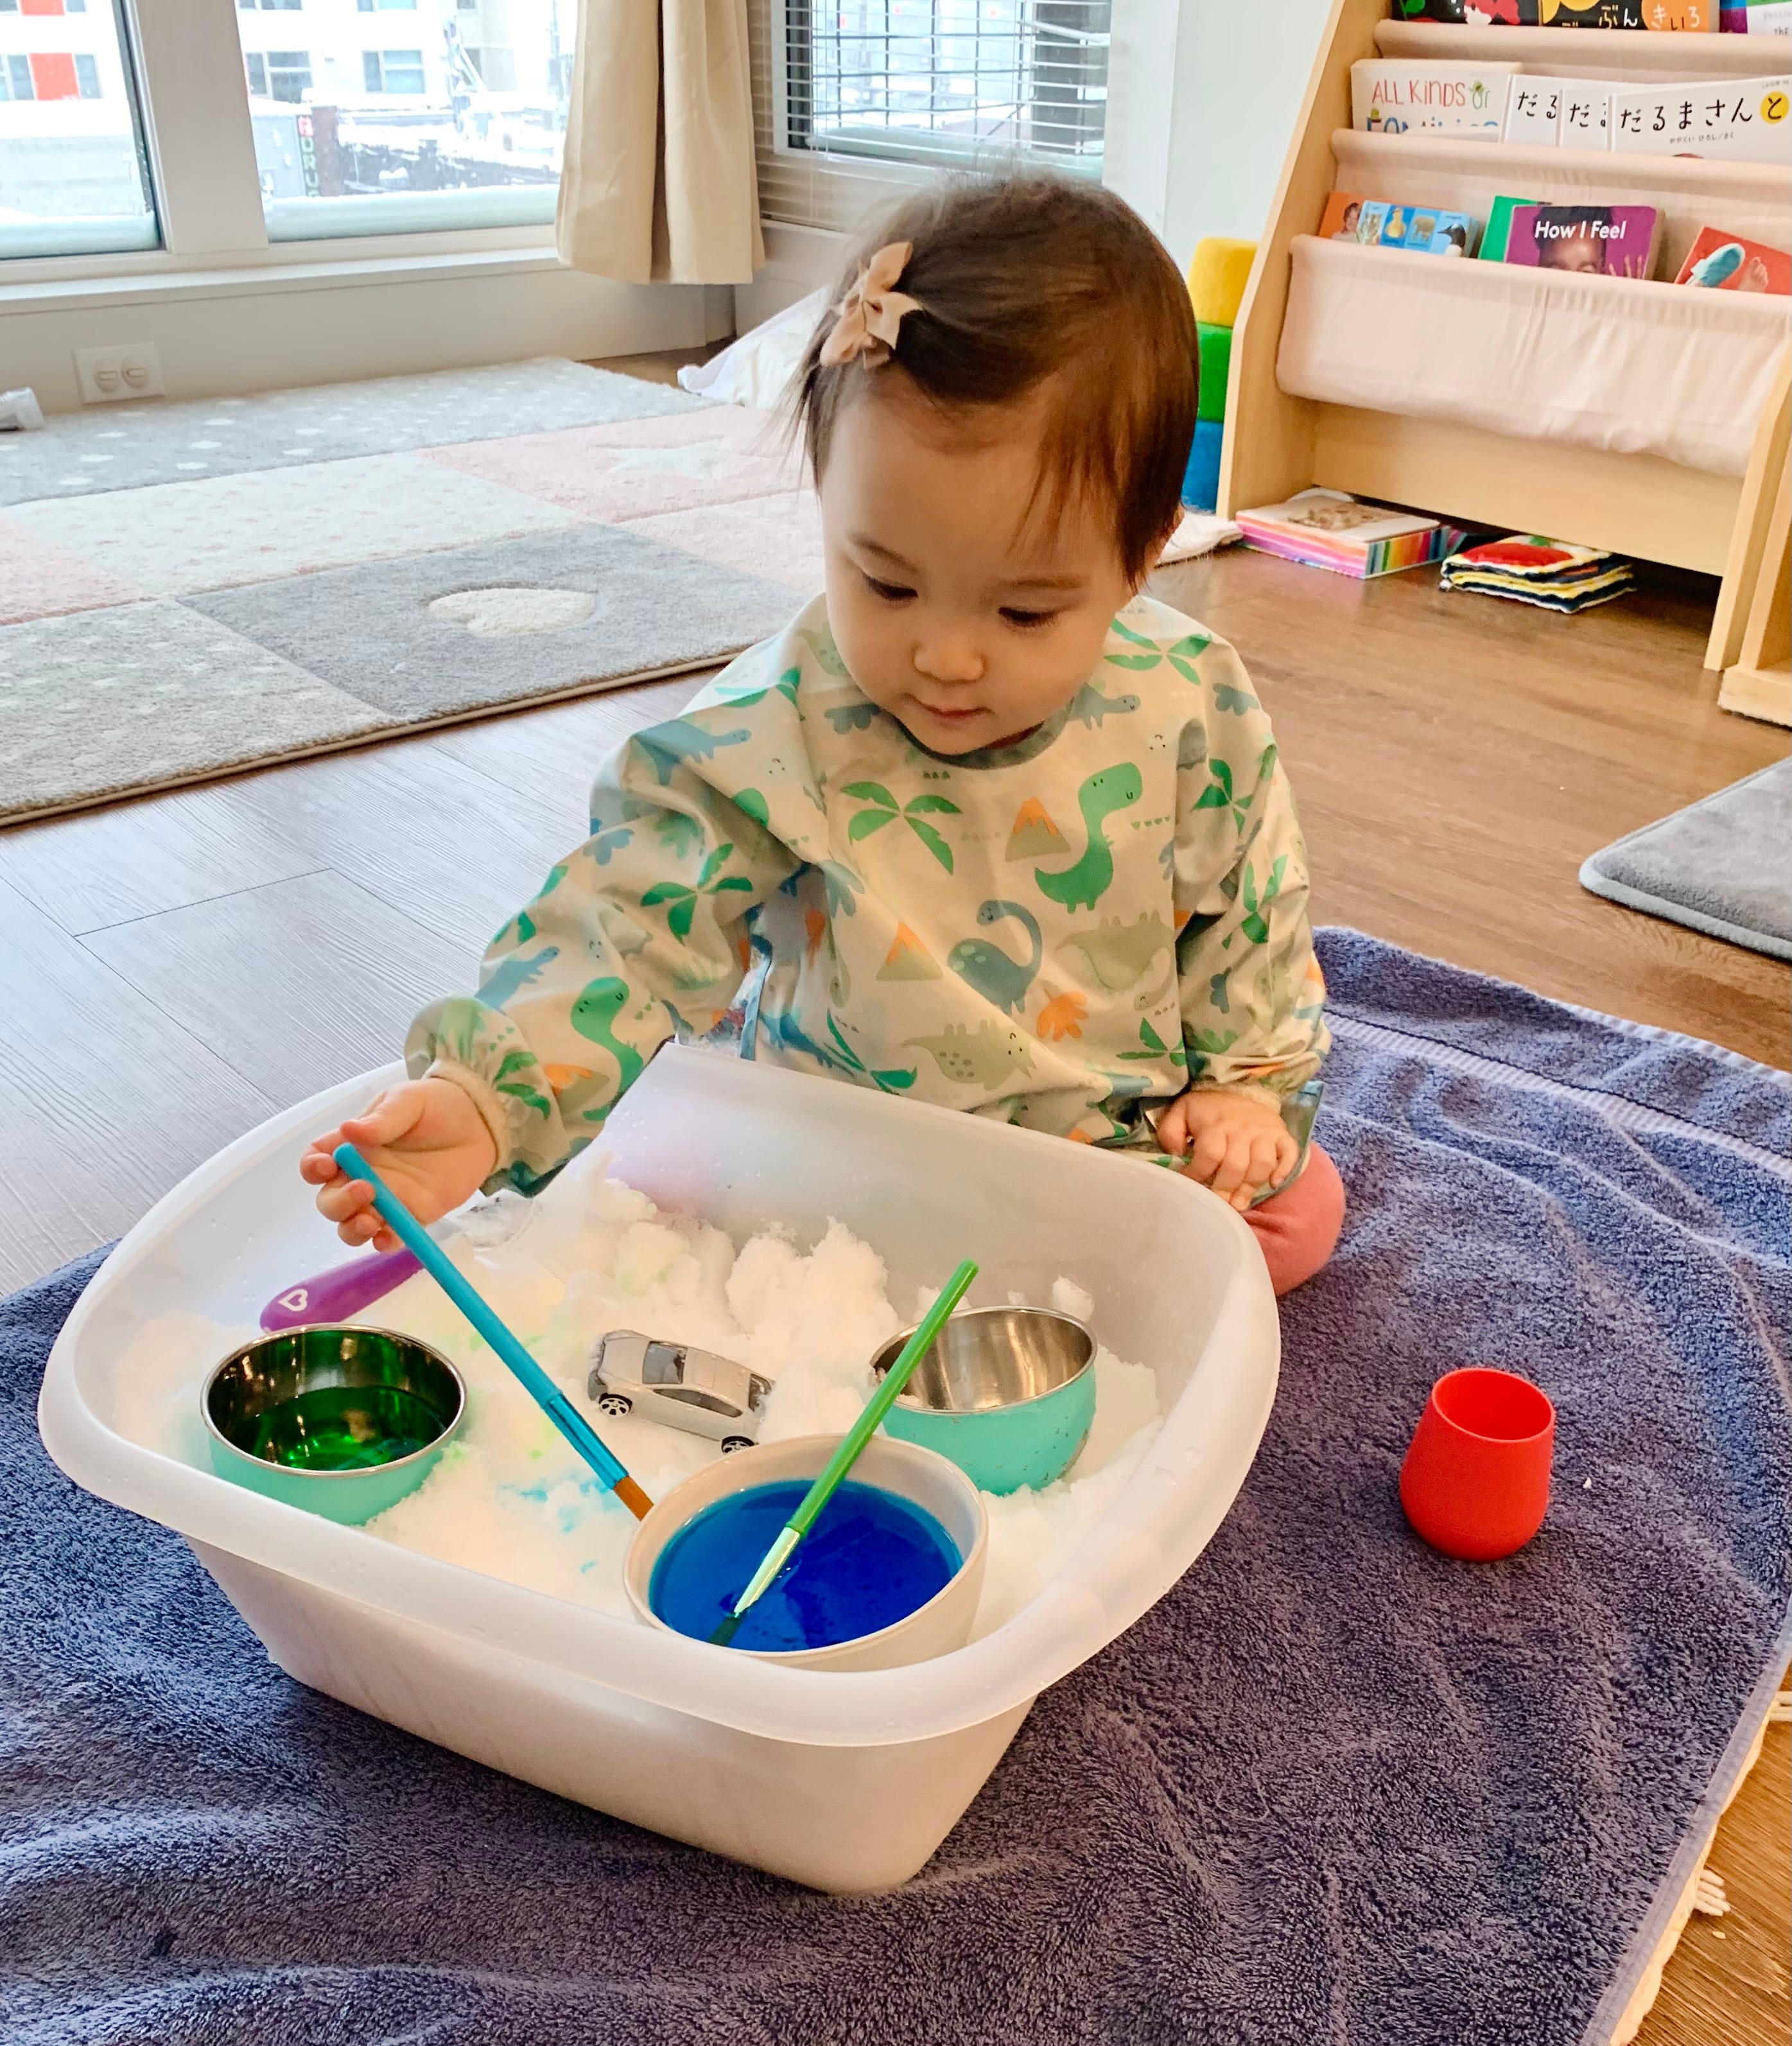
We finally got some snow where we live! I was so excited to introduce snow to L and see her reaction! At first, she was a little confused and did NOT want to touch it. By the second day, however, she was in love! I put together this super simple invitation to play for her to get more time to play with the snow as we do not have a yard she can play in.
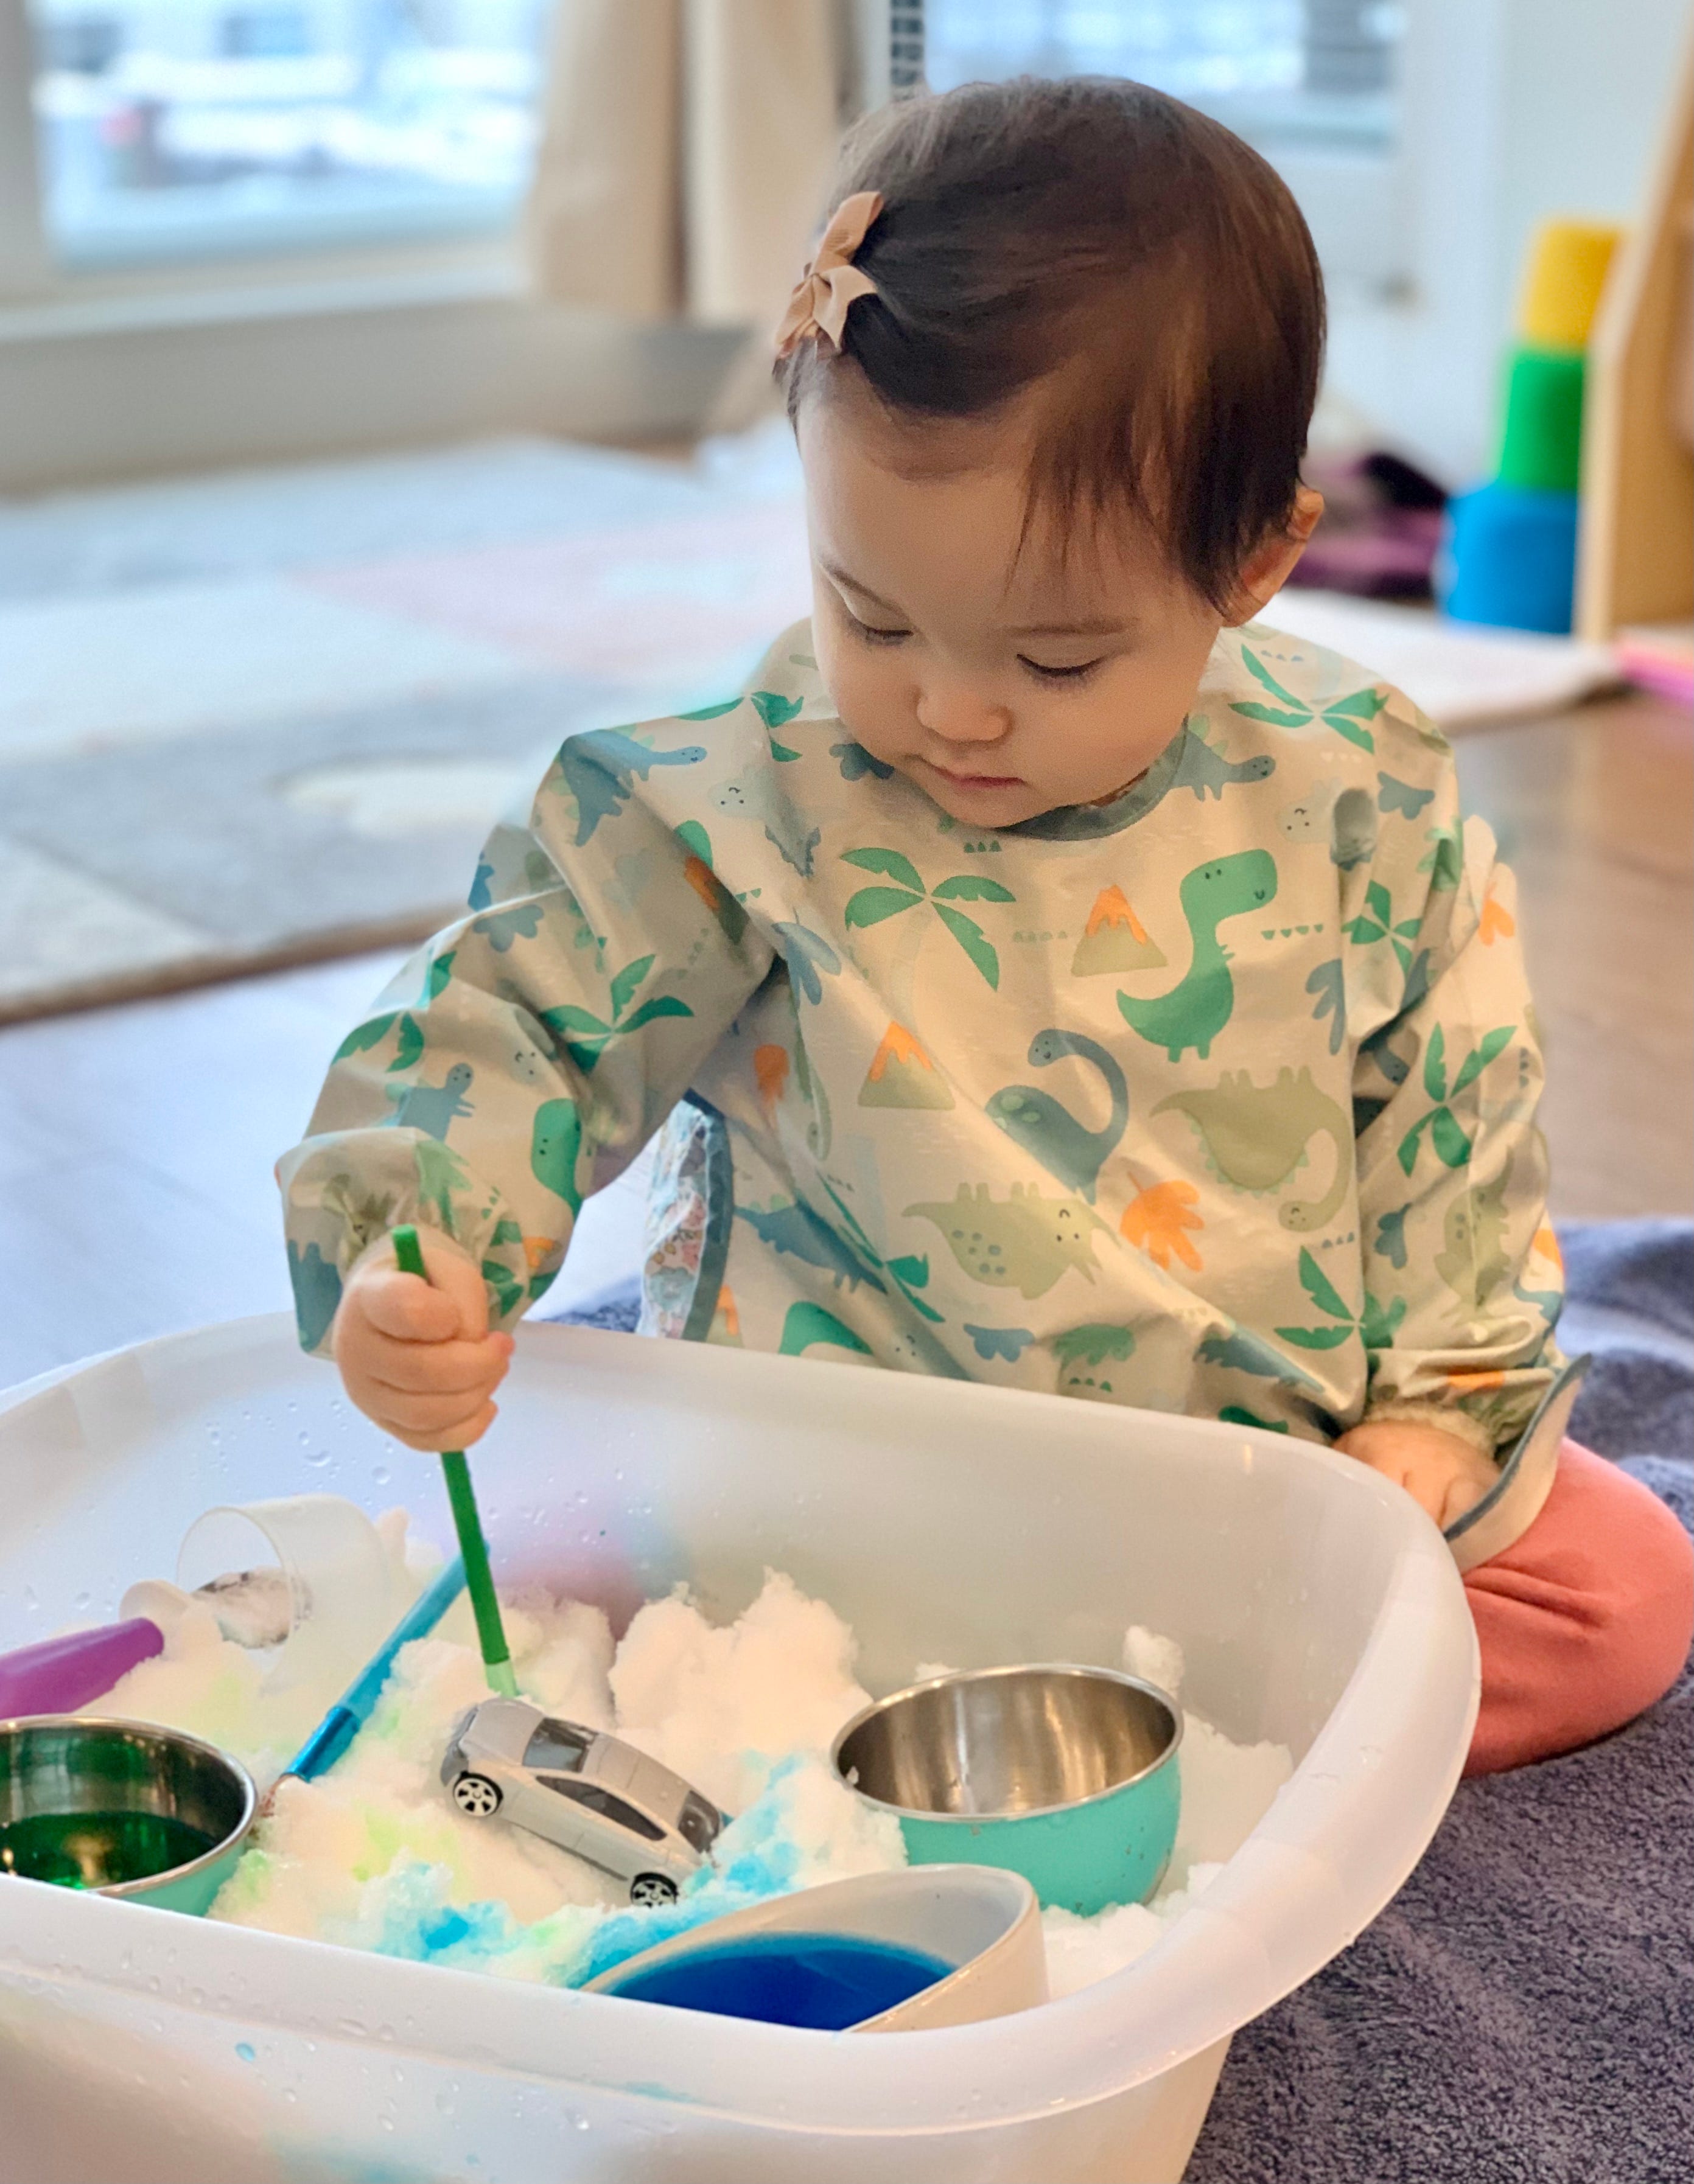
Materials:
Snow
Sensory bin
Water color paints or food coloring and water
Cups
Paint brushes (bigger is better)
Scoops
Simply put the water colors or water and food coloring in small cups or bowls and place them in the sensory bin with snow, paint brushes, and scoops! L enjoyed this activity essentially all day long. She kept asking for more!
Don’t forget to comment, like and share this newsletter if you enjoyed it! You can also find more on my instagram by following @moonbaby_mama!